And now for the final project before August is done with.
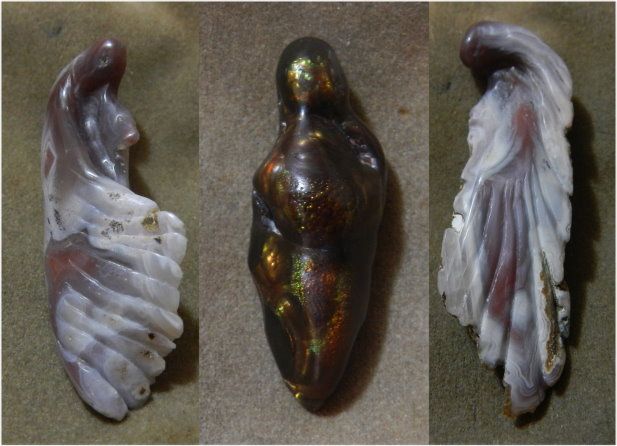
Lets call it "Angelic Protection"
While waiting to get to the shops to buy new burrs for frosting the quartz, I started a new project.
Cut this Thunderegg from Agate Creek in Australia, a few weeks back:
dancer27 Thanks Allan. Its one of your wonderful pieces that you so kindly lugged all the way to Hong Kong. woohoo1 hugs23
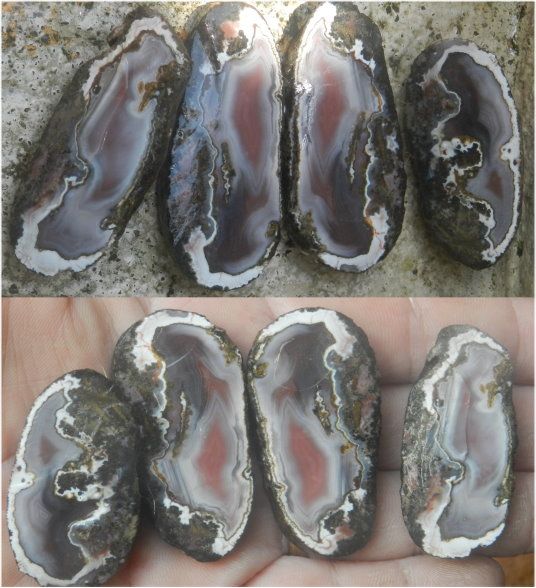
At first I gave the third from the right a shot, by trying to turn it into a cab.
Did not like that look too much, plus I saw something at the back of it.
So I tried to cut of the table of the cab to thin it out for a possible carving.
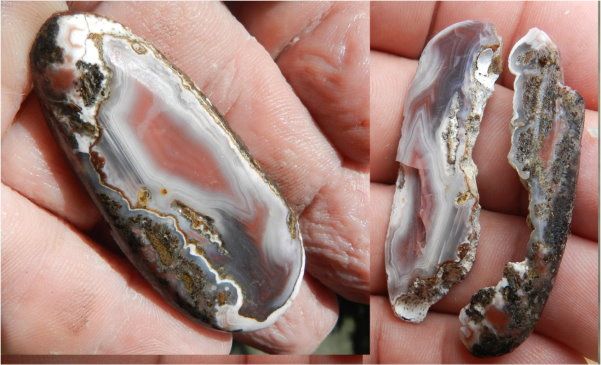
As you can see in the following pictures, that separated solid agate from all the other unstable rest. Now at first I thought I can throw the whole thing away, but as it turns out it just enabled another project. Needed a second one so I went on to destruct all the pieces in the Thunderegg to get this pair.
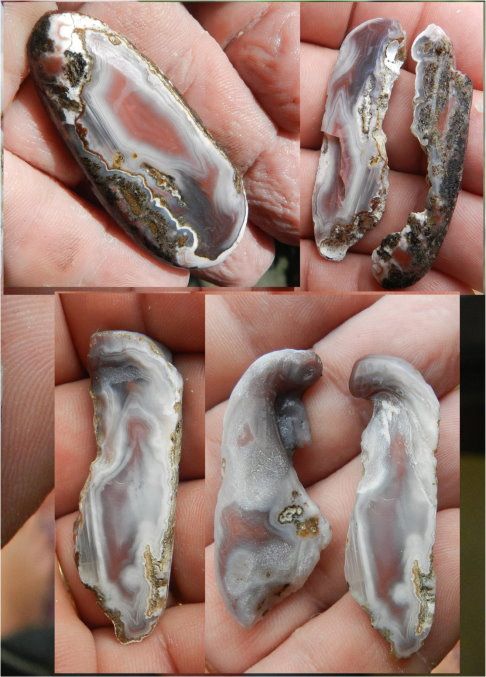
I shaped the pieces this time first (something new for me), as I would like to keep it to as few cuts as possible. Here are the pieces as or right now.
Now the hardest part is still to come, fitting everything together and mounting on a background.
First fitting today:

The above is a mock-up of how I want it to fit together. Managed a flat back today, now I need to inlay it into a background. The right wing should be completely inlaid, and the left one needs to stand above the background at the wing-tip, yet only half buried at the top.
Edit October 7, 2014. This piece is still not done and awaits patiently to be completed.
Not much has happened since I last posted as I got too deeply into FA starting with real rough. That takes a lot more time than just with windowed material. saved12
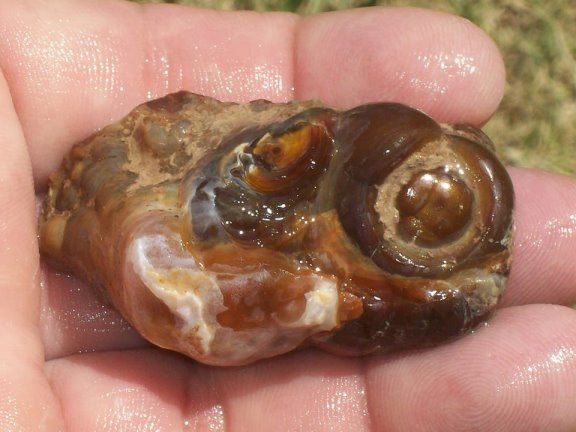
Darker beauty with a mixture of colors. Depending on light-conditions colors change and some are visible at any time. Unfortunately, while the color cover is a 100%, there is no single angle to show it in its entirety. There are orbs in the back and the back needs some more work to iron out the spots where I left the polish-cream. While possibly not considered the best color, I like the look of it. Its visible, but not over the top. There is some subtle-ness to it, that exudes a kind of noble touch, that I prefer over a lot of other pieces. Its definitely a piece that is going to be worn by me personally. Coming in at 130ct, so its not really for a delicate feminine neck. :)
Rough provided by Christopher Anthony, so I'm indebted to him yet again for providing exceptional pieces to work on.
Starting-point
Outdoors finished
Back and front
Five weeks in the works, but definitely worth the effort. Al the while learning new things.
Lesson number one: the brightest colors are quite often the first you hit. So working from the edge (as advised by nearly everyone working that material) means that you are missing out on some subherb colors. Takes a lot longer, but if you are ready and can preserve it, its definitely worth it. The working from the edge approach is more suited for windowed pieces.
Lesson two: got a good color? Dos not mean that you are even close to the color itself and the color changes on the way down in often unexpected ways even if you did not remove any colored layers. A third of my piece is like that. And because I dont know how deep the color is, I cant use the machine as it looks like I'm working directly on the color. So hand-sanding my way to the color has lead me in one place nearly two mm down and I'm still not there. Then you can imagine why it has taken so long to get thus far.
Lesson three: Letting the stone heat up during polish, when you are directly on the color; intensifies the color somewhat, but also darkens the appearance. Sanding it over makes it a bit brighter again but endangers a change of color.
Lesson four: Blue color is desirable and highly priced because the layers are impossibly thin. You need to be lucky to get them. You either end up with a bluish green (if not enough polish) or drop into a void (if too much polish/sanding).
Lesson five: Six years of practicing means nothing when you come across new material that you know is of good quality and you want to take extra care to get it right. :) :)
Next up was another JEBEREDHIAH FA
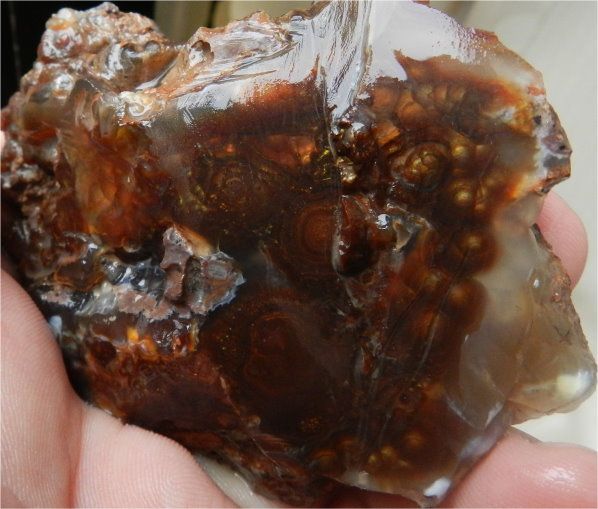
This one started with peeling onions a while back.
Did not get far with the colors as every-time I thought I could settle on something, something larger peeled away giving me a completely new picture. So I decided to keep what I've got and do some carving instead.
Here are some stages
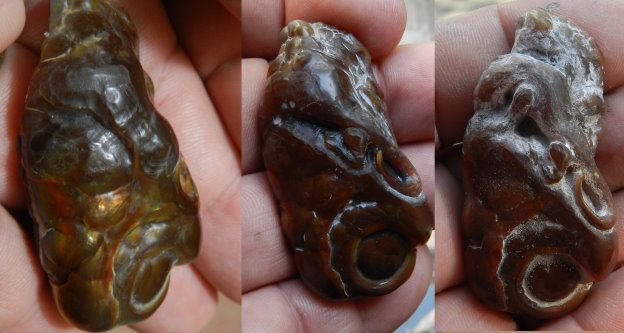
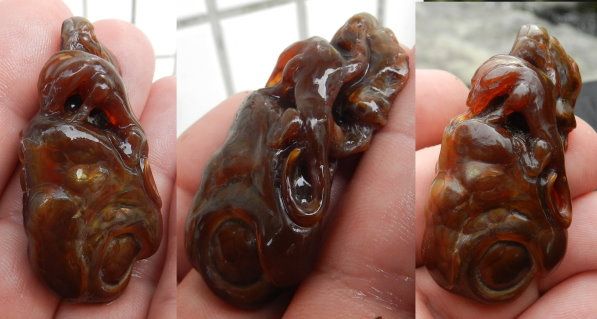
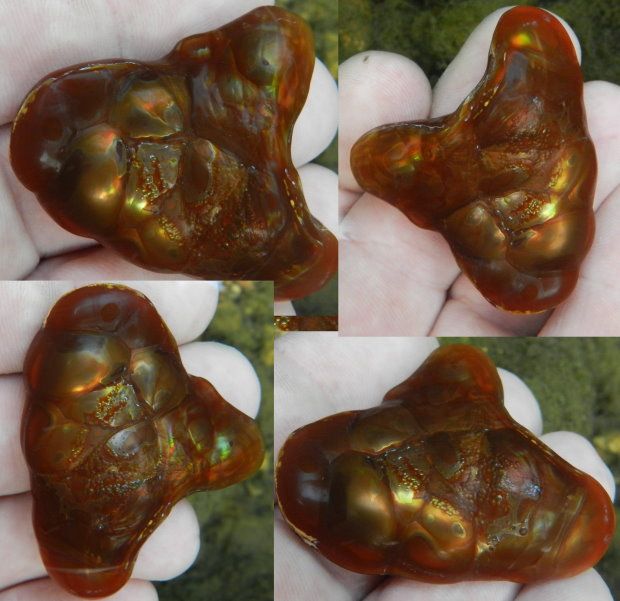
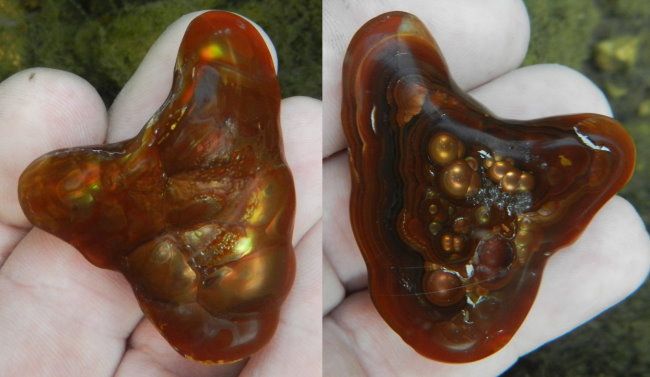
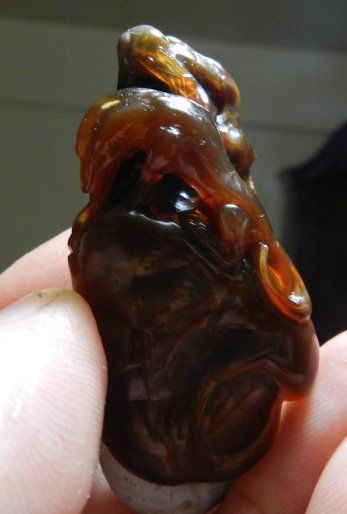
A few angles of the salamander
Have not seen sun in a while, so this will have to do as the best picture from the last couple of days
A size comparison with my son who is pretty much as big as me.
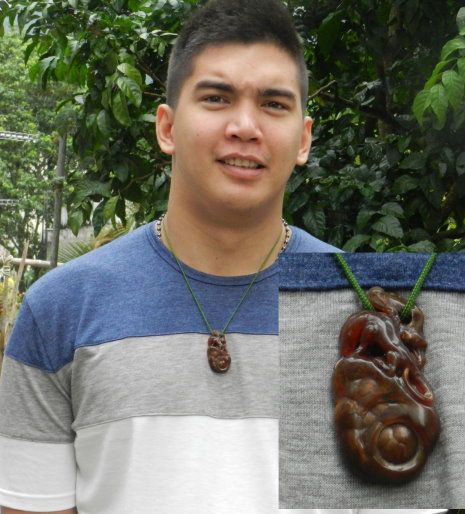
But lets save the best for last:
The pictures above are all taken the way any viewer would see them. When I look down on the pendant while wearing it, I get much stronger color and metallic effect.
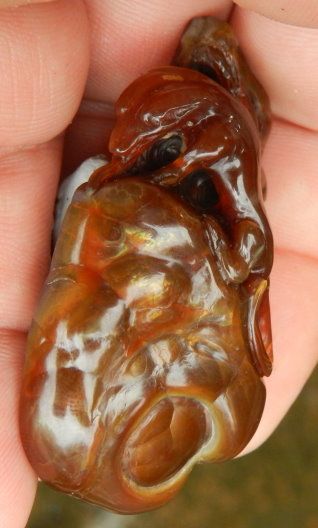
And best of all: Not the fire I'm afraid. But something just as mesmerizing. The chalcedony or is it sard, that is nearly void of the brown color. Its that layer that is vexing me since months now on this material, because it alters the colors underneath according to thickness, and its translucent property does not allow perception of depth. But,......... when light hits the piece from above, it seems to literally illuminate the whole of the salamander from within and makes it stand out.
And to end the year one more JEBEREDHIAH
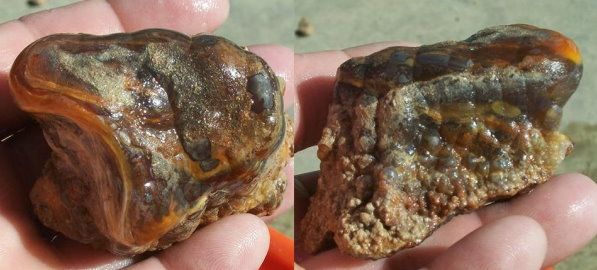
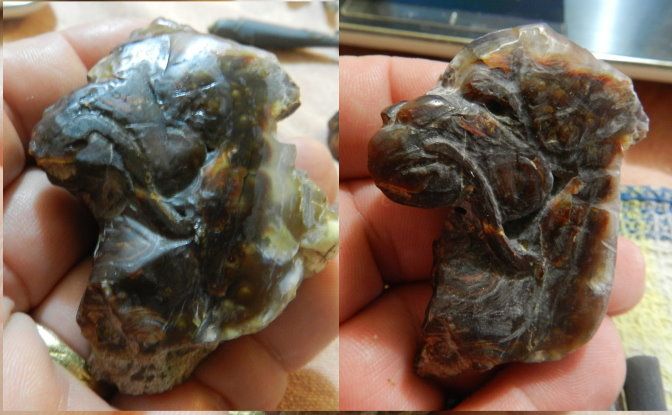
Was lucky to get a rather big piece of Christophers Agate and after taking off the colored top, it revealed continued structures underneath.
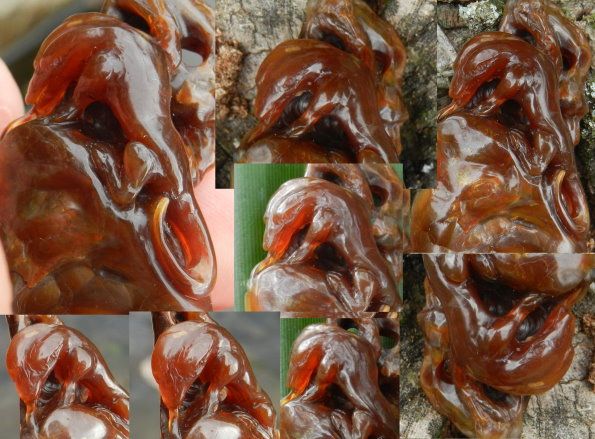
The fringe of which has an interesting design that lends itself to either a face with strange/punk-like hair or a head of some sorts. After starting with the idea of either a horse or a birds head, I settled for attempting something I rather fear; a dragon head. Have always shied away (even more more than human faces) thus far. So make it or break it, I gotta try sometime? Right? No better time than right now.
Here is the top I got out of that piece and cut to size on the right to start the new project.

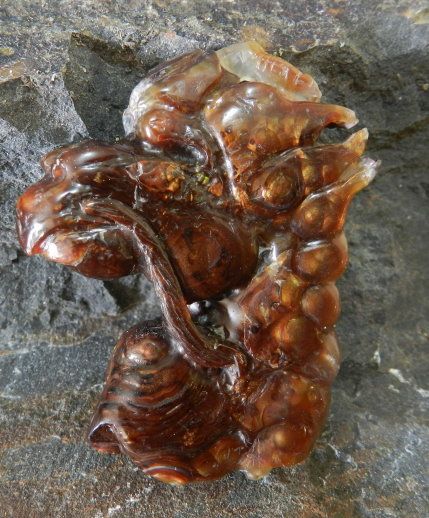
OK, little progress to be had this week. Preformed head and torso. Now I got to sand it down for the rest of the week and hopefully get some details into it by coming weekend.
Got into trouble several times by hitting dirt and empty spaces. On top of that, there seems to be a fracture running right across the snout. So will be on my toes all the way up to the finish-line, if I want to keep it in one piece.
The biggest problem still remains: Finding a balance between color/fire and definition of subject at hand.
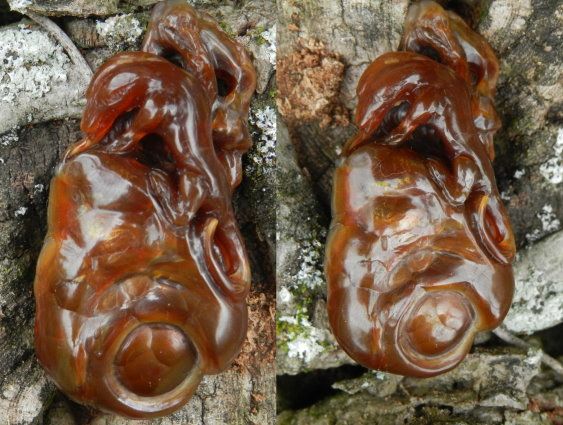
Indoor under normal room-light on the left and outdoor in full sunshine on the right
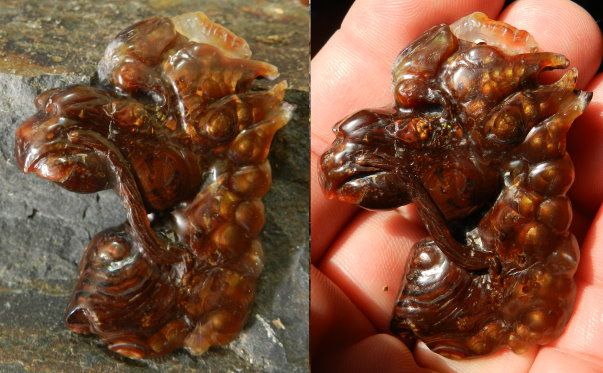
Christopher has some wonderful color in the material he collects from his claim, but its hard to have them shine in a massive piece like this. Its hard enough to take pictures of FA any-day, but when it comes to bigger pieces like here, the stupendous colors often get lost in the whole composition.
Thats it for 2013. Looking forward to a better 2014. Kurt

 Author
Topic: Unfinished business and lazy last quarter 2013 (Read 5150 times)
Author
Topic: Unfinished business and lazy last quarter 2013 (Read 5150 times)